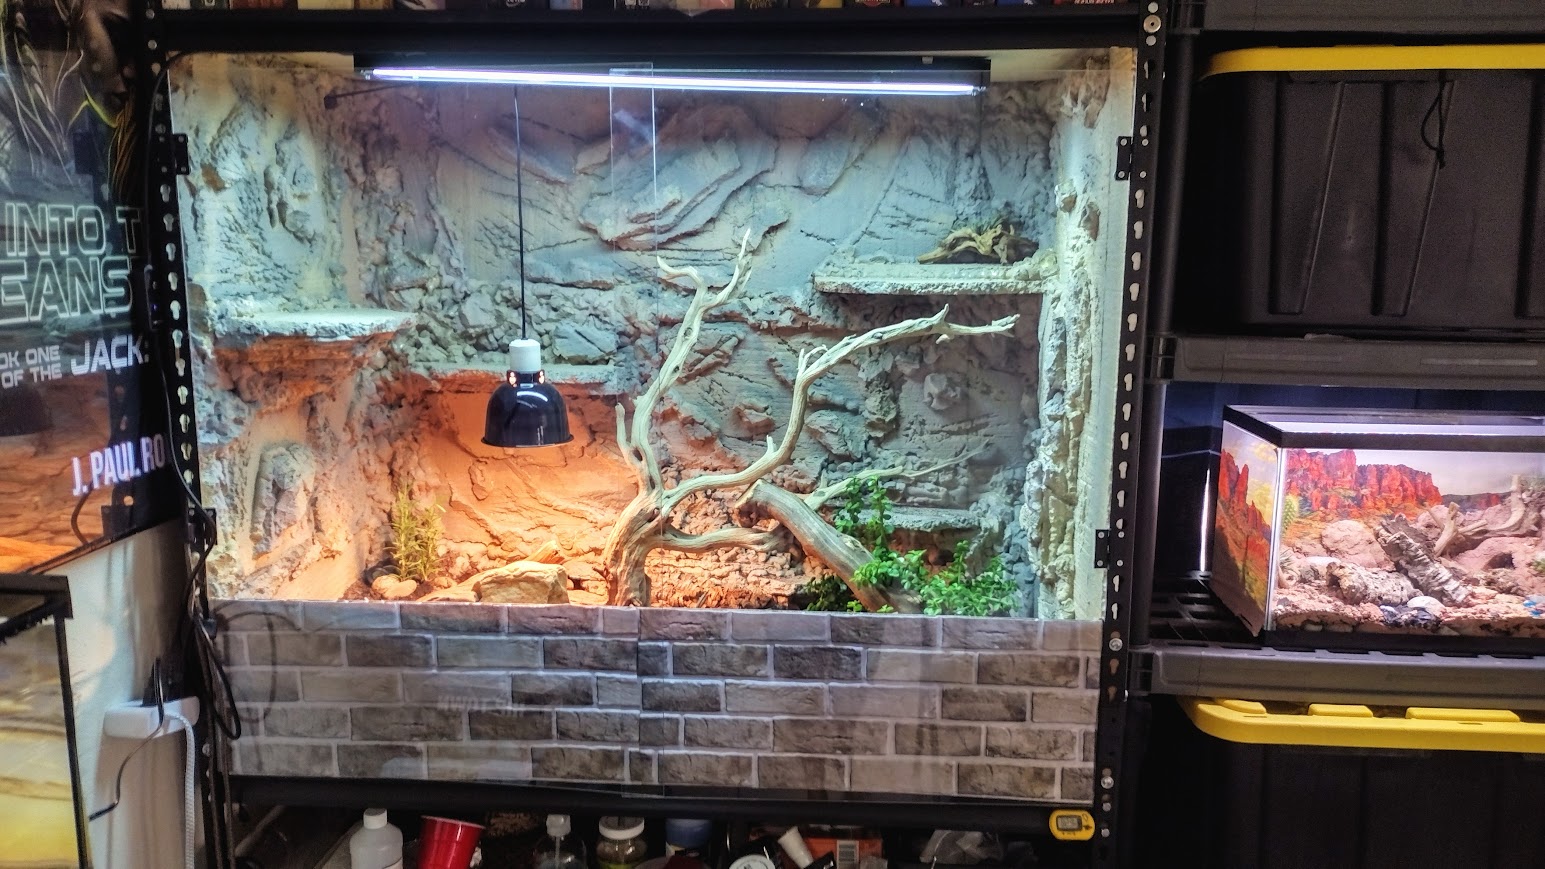
When it came time to upgrade Tad Cooper from his starter home to a much larger enclosure — which came very soon after adopting him, I’ll say — I did my usual, obsessive amount of research.
That meant reading a lot of reviews. And what I discovered is that it seemed like whether I was looking at 120 gallon enclosures in the $250 price range or the $600 price range, there were usually complaints about quality, service, longevity, or something about the product. In short, it seemed like I was taking as big a gamble with a $600 box as I would be with a $250 box.
That made me gravitate toward the Zen Habitats and Mojave 4’x2’x2′ enclosures. I juggled between the two for a while before realizing I’d also need some kind of stand to put Tad’s new home on. I had plenty of shelving and tables, but nothing that really fit something of that exact size.
What to Put a 4’x2’x2′ Enclosure On?
Looking at the stands made for these units, I was immediately turned off. Most of them cost as much (or more) than the enclosure itself — if you could even find them — and they didn’t look built well enough to warrant the cost.
So, more research. I looked everywhere for shelving, stands, and tables trying to find something that wasn’t going to cost as much as the habitat. Eventually, I had the brilliant idea to buy one of these $119 workbenches from Harbor Freight. (That I’ve gotten on sale for $99.)
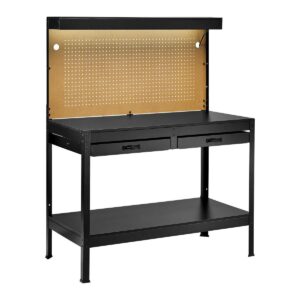
I’ve owned them in the past, and they’re strong enough to hold up an enclosure. I even had one outside in rainy Florida weather and it lasted two years with minimal warping. They have built-in drawers and power outlets, and most importantly, the surface is 4×2 (though I would have had to skip installing the back panel).
Perfect? Could be. But I ended up going a different route after discovering these cheap-o garage shelving units from Muscle Rack.
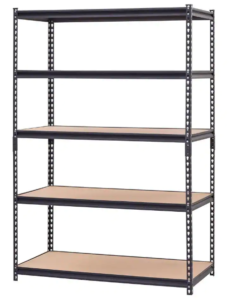
Funny enough, the problem with a shelf like this is that it might not be exactly built to measure, such that a 4’x2′ enclosure might need to be coerced to fit on its 4’x2′ shelves. I even saw a review from someone using a similar shelf to house a Zen Habitats enclosure that confirmed he had to cut and bend pieces to get the enclosure to fit.
What a hassle. But then I had an epiphany while falling asleep puzzling it over.
Why Bother With the Enclosure at All?
It dawned on me that I was going to pay $300 for a box. The most difficult part of building your own box is framing it — getting the sides to stick together so that it stays a box. Well, if I’m already buying a 4×2 shelf, I’m buying a ready-made frame with a floor and ceiling. And it’s going to be a hell of a lot sturdier than the construction you get from a $300 enclosure!
That meant I wouldn’t need an enclosure at all, just three walls and a door. I pondered this idea for several days, shopped for parts, and ultimately pulled the trigger.
NOTE: I built this thing under less than ideal conditions. I didn’t have all of my tools, and I was working with some tight budgetary constraints. At the time, I’d never built any kind of reptile enclosure and had no idea how any of this was going to work out. I made a couple of choices that turned out okay, but I would do differently next time. You’ll be learning from my mistakes.
That said, I ended up with a result that blows people away, and more importantly, I got an enclosure that looks like a very expensive custom job for less than I would have paid for some off-the-rack 4x2x2 habitat!
Building a Reptile Enclosure Out of a Muscle Rack Shelf
The core of this plan was a Muscle Rack shelving unit. These are everywhere, including Walmart, but I ended up buying mine from Home Depot because I didn’t want to wait for Wally World to ship one in. They’re priced anywhere from $120-$170. I’ll also point out that I’ve seen units that look identical on Amazon for around $100 sold under different names, but I can’t vouch for their quality. They might be the exact same shelf, or they might use inferior materials. Not sure.
I also wanted to build the walls at the same time as the shelf, so I purchased three sheets of hardboard (aka hardy board) from Home Depot as well. You know what size they come in? 4 foot by 2 foot! A match made in heaven — and they cost me about $22.
Now, you might be wondering why I chose a material that’s not super water resistant. This is essentially the material they make the cheap parts of department store furniture from, after all. Truth is, one side of hardboard — the smooth side — is somewhat water resistant. If you want to get tempered hardboard, it’s considered fairly water resistant overall.
You can also use HPDE, acrylic, or pretty much anything you dang well please as long as it’s not toxic. You’re just making walls! I even considered using greenhouse paneling because it’s so cheap and durable.
But really, you can’t beat $7 a panel for the hardboard — and I knew I was going to be waterproofing the inside of the enclosure anyway.
Since I wanted to make my walls secure, I also purchased a few packages of nuts, bolts, and washers. Because the shelving unit features holes for mounting the shelves, I would simply bolt the boards into the legs through the existing holes.
Assembling the shelf wasn’t much of a hassle. I recommend using a rubber mallet to pound the shelves into place. I cut a corner here and just wrapped a towel around the shelf frames before smacking them with a carpentry hammer.
Using the shelf gave me plenty of options for enclosure size. I could have built a 4x2x2 into the unit (or two, really) but I decided to go big. Using a total of four of the available shelves, I put one at the bottom, created space for two storage totes, then added another shelf to make a storage shelf below the enclosure proper. The floor of the enclosure was the third shelf which I installed about three feet from the bottom. The final shelf went in the very top position, thereby making the roof of the habitat.
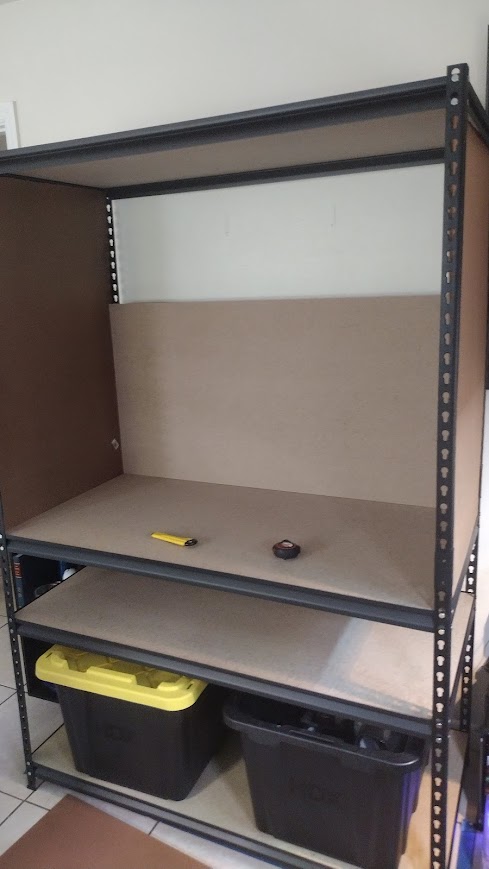
This left me with an unused shelf, so I repurpose the wood insert as the lower portion of the enclosure’s back wall. I then cut the hardboard to size (using a box cutter, mind you. Didn’t even need a saw!) and bolted them into place. Ultimately, he ended up with a 4 foot x 2 foot footprint and 4 feet of height.
I cut off a 10” tall section of hardboard to make the front portion of the enclosure, and it gave me a lot of depth to add substrate and plants.
Sealing the Bioactive Enclosure
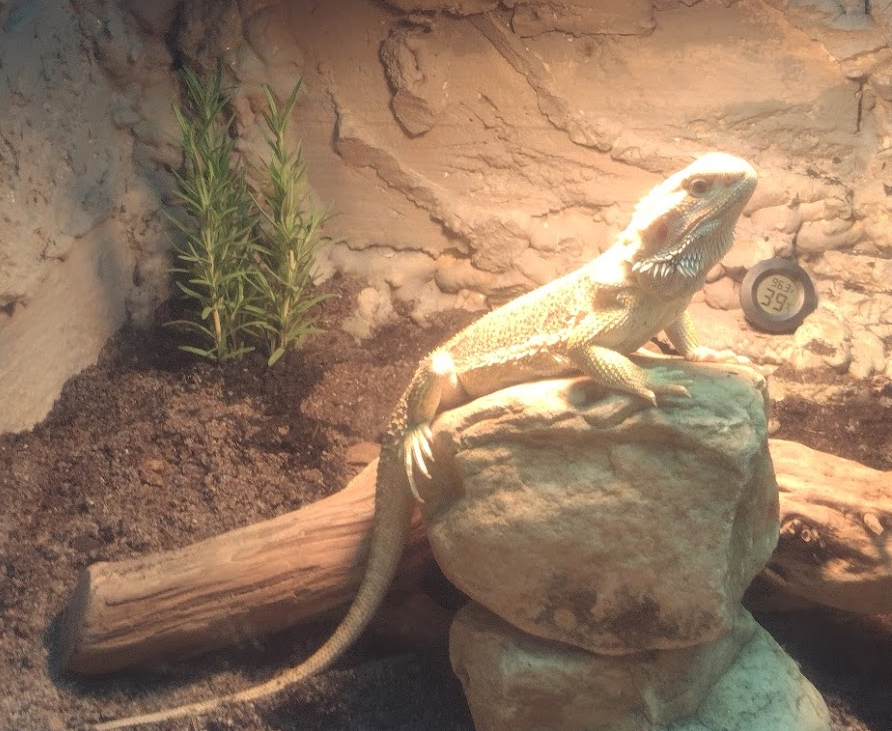
Yes, plants. My plan was to upgrade Tad to a bioactive enclosure. And since he was obsessed with free-roaming his way onto my hydroponic garden to lounge, I knew he’d love being housed with his own plants.
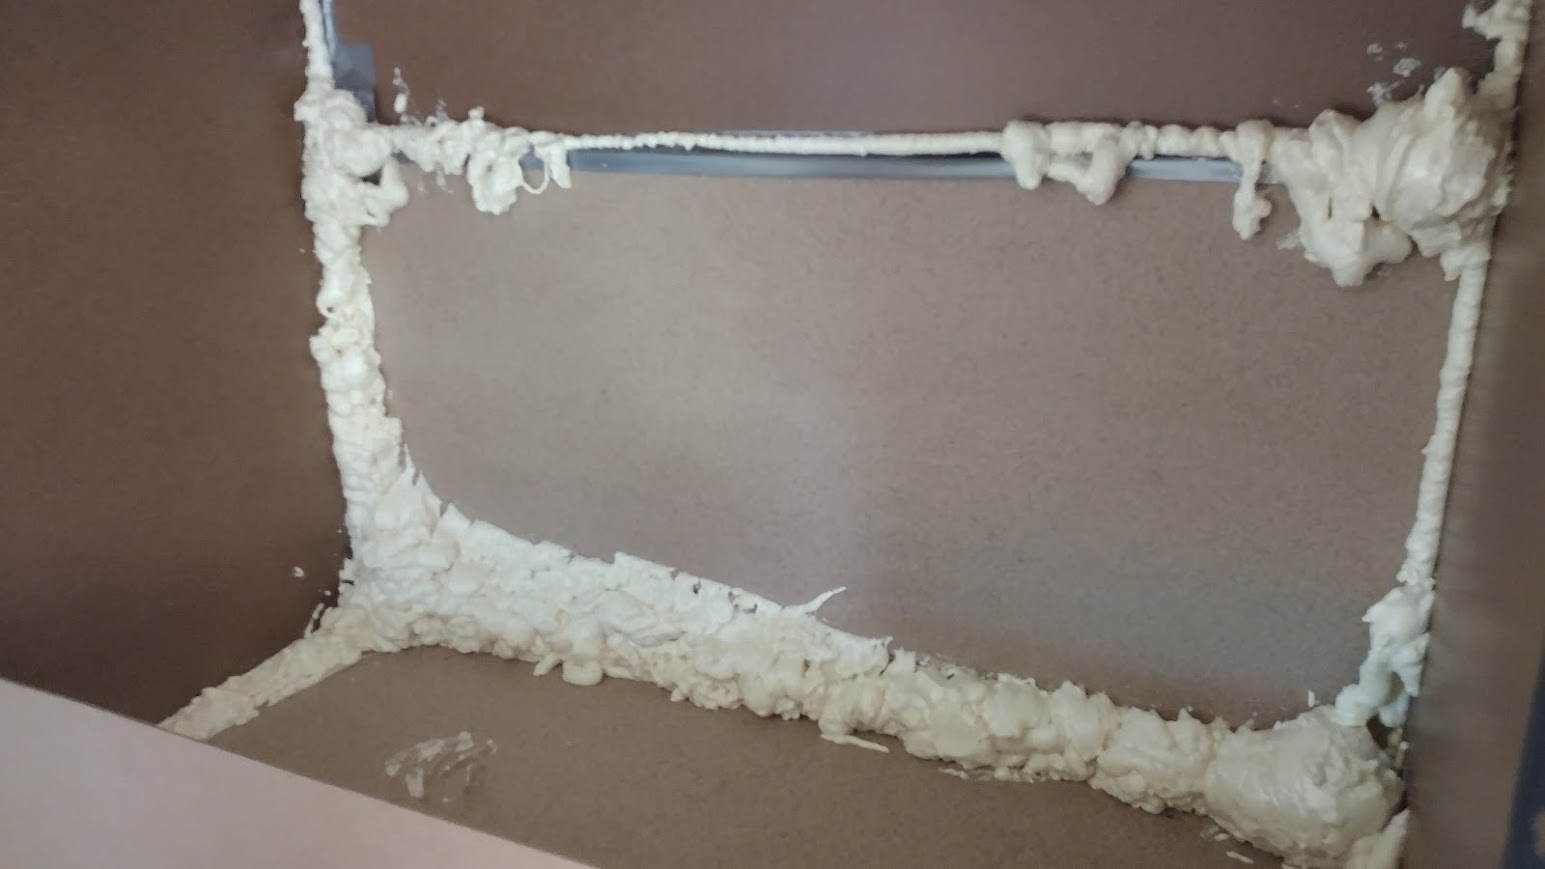
Of course, this meant water and dirt would be going into this wooden box, and that meant sealing it. Because my aquarium silicone hadn’t arrived yet and I’m impatient, I went ahead and sealed all the cracks (the joints between boards) with Great Stuff expanding foam.
Then I started foaming the interior with the plan to carve and sculpt the Great Stuff into faux rocks. Again, this was something I’d never done, but it looked pretty straightforward.
Hardscaping
I’d bought three cans of Great Stuff from Home Depot, totally unaware that it would take something like twenty cans to foam the entire enclosure. So I didn’t do that.
After using my three cans and barely making any progress, I bought five more cans and a package of insulation foam boards for about $11.
My aquarium silicon had arrived from Amazon, so I set about breaking off pieces of the hard foam, gluing them together, and making my fake rocks with this method. Some of the board I siliconed directly to the outer walls before adding the decoration. Once that was all set, I used my five cans of Great Stuff to add support to the ledges, fill in gaps, and generally just make sure all of the hardboard was protected from water.
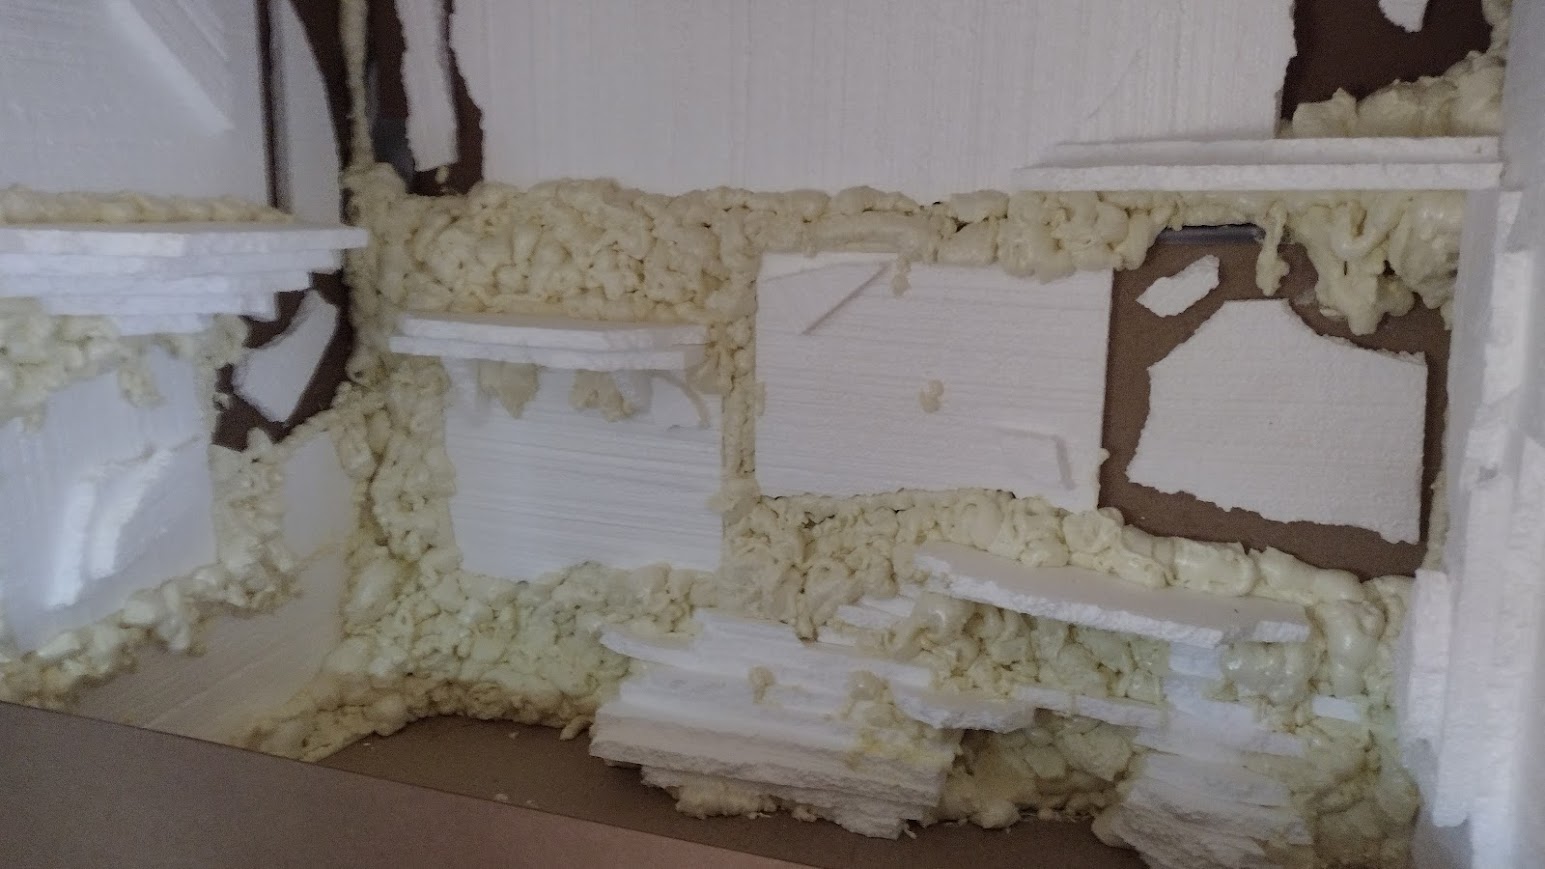
Shaping the foam was both fun and a massive hassle. I spread this process over two days, just using a serrated steak knife to cut all of the Great Stuff blobs and foam ledges into better shapes. Honestly, cutting the round GS bubbles and blobs was the biggest pain, and I actually think next time I do this, I will only use the expanding foam to seal, not to sculpt.
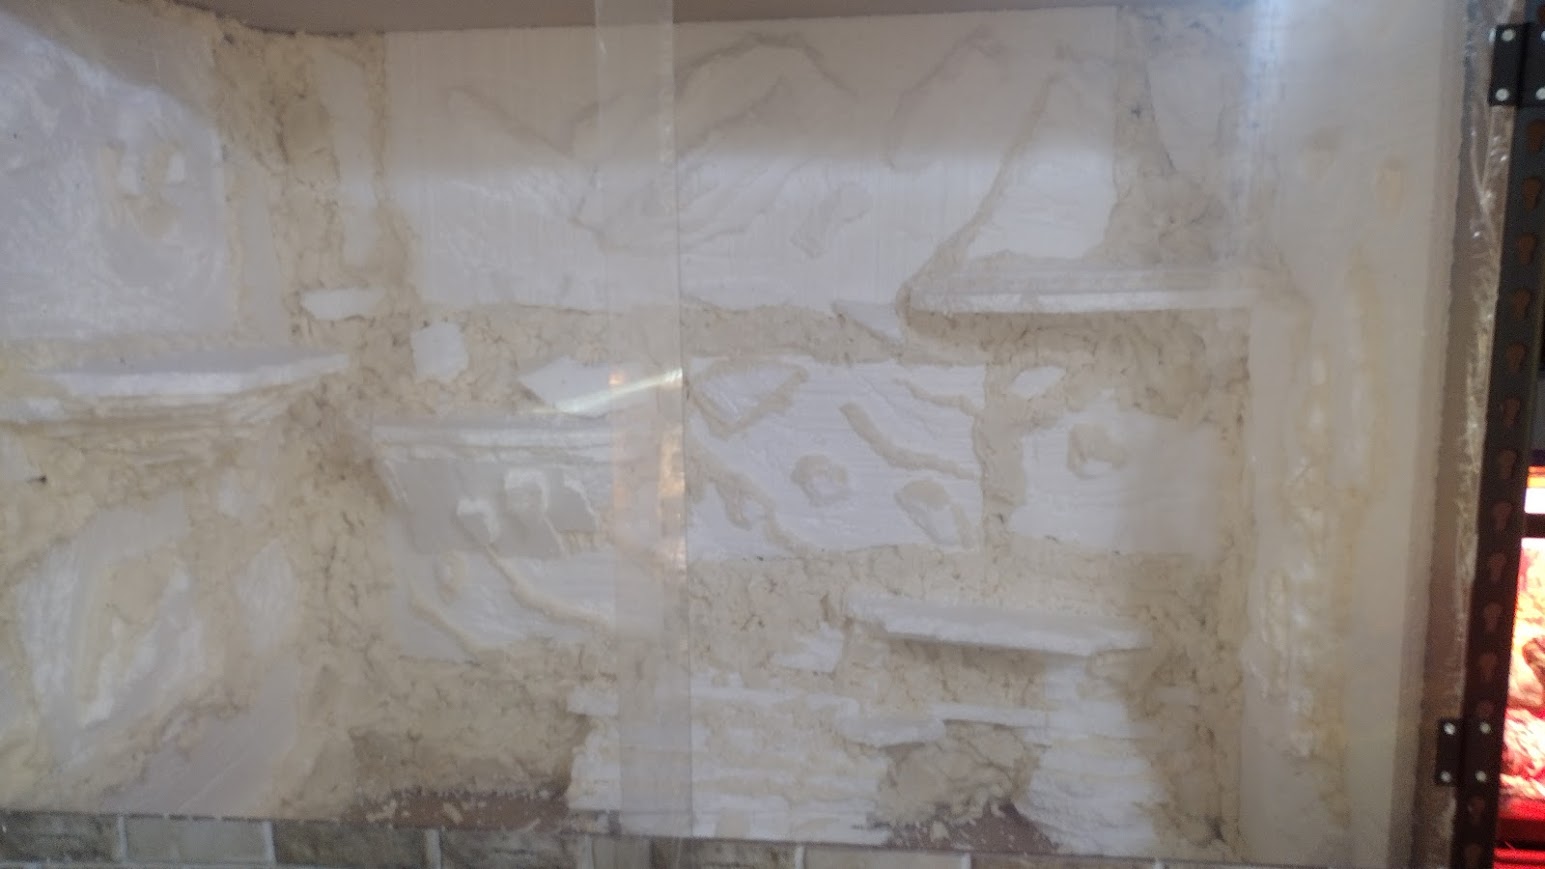
Making the foam boards look like rocks was much easier. You seriously just break off pieces, glue them together, and carve away. The cheap foam I used is messy, though. Little particles will get everywhere, so be prepared to Shop Vac the inside (and the surrounding room) multiple times before painting.
The Doors
With this enclosure assembled and sealed, I still had to figure out what the heck I was going to do for doors. Going into this project, I knew this would be the biggest challenge overall.
I spent days shopping around for deals on glass, plastic, acrylic — anything I could think of. Finally, I found a deal on Amazon for two pieces of almost perfectly-sized acrylic for less than $30.
That would give me the material, but how would I mount them? I never really liked the idea of sliding doors to begin with, so I wanted to go with hinges so I could open the entire enclosure fully without removing any panels.
When the acrylic sheets arrived, I was thrilled to find them sturdy enough to serve as doors while being lightweight enough to hang from hinges. Even chintzy hinges.
I just grabbed two sets of hinges from Home Depot along with more nuts and bolts to use instead of the included tapered screws. I was able to use the washers leftover from building the walls, so no need to buy more of those.
For this phase, I bolted the hinges directly to the shelving unit’s legs (perfect fit through the existing holes, yet again!) and aligned them. Mounting the doors was just a matter of holding the acrylic sheet up to the hinge and marking where to drill. I did this one hinge at a time to avoid mistakes.
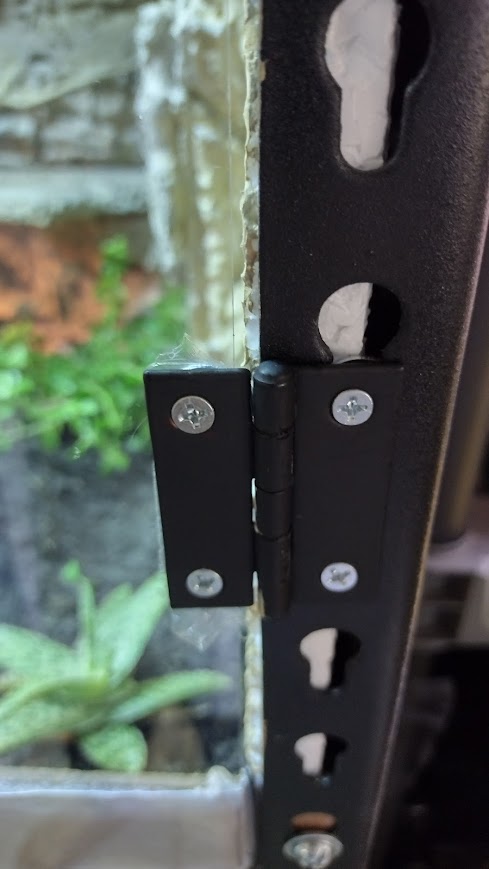
(Put the acrylic sheet solidly on the floor and drill it slowly to avoid cracking it.)
More of those nuts, bolts, and washers worked to attach the doors to the hinges and everything came together! As you can see, the acrylic sheets were a bit wide, so I ended up with overlap. My original intention was to trim these down, but I never did. The overlap didn’t bother me much, and enclosures with sliding doors usually have that anyway.
Sealing and Finishing the Hardscape
I’d never done this before, but I’d seen a lot of videos. I knew the next step after carving all this foam is to paint over everything with Drylok (a masonry sealer that’s latex based and non-toxic).
Problem was, I thought I had a better idea. Since I was having a stupid hard time finding plain old Drylok locally, I found something online called “Pond Shield”. This is an epoxy coating that’s meant to be used on ponds, but I saw that a lot of zoos use it on their enclosures. Since it came in a convenient tan color, I thought I’d give it a shot instead of the Drylok.
The 1.5 quart tan kit cost about $80 on Amazon. When it arrived, I went to work mixing the two-part coating and slathering it on.
Two things about this plan disappointed me. First, the 1.5 qt kit only had enough material to cover about ⅔ of my enclosure with one coat. Secondly, it didn’t cure into a rigid shell. You see, for some reason I was picturing that this epoxy material would be relatively hard when it dried. Maybe like resin. Instead, it was flexible, and with only one coat, it didn’t seem like it would offer much protection.
Luckily for me, I decided to try a tiny local hardware store instead of ordering more Pond Shield. Therein I found a gallon of standard Drylok that had been sitting on their shelf for three years (no joke). This stuff comes white as snow, and they refused to tint it, so I just bought a few small bottles of Waverly non-toxic chalk paint from Walmart in shades of brown.
This was the much better way to go. I’d pour some Drylok in a Solo cup, squeeze in a few drops of chalk paint, and mix a nice, natural color. Variances in shade were great (made the rocks look more realistic) and the whole process was much easier and cleaner than using the Pond Shield. The Drylok brushed on like paint, but I globbed it on in the nooks and crannies to make sure I sealed the gaps and surfaces. (Drylok actually tells you to poke the surface with your brush to push the sealant into rougher textures. At times, I was stabbing the paint into the fake rocks more than I was brushing it.)
The gallon of Drylok was enough to give the entire interior two coats with leftovers to spare. Conclusion: I should have just used the Drylok to begin with. Because that’s $80 I needlessly wasted, I do not include it in my estimation of this enclosure’s cost.
The Doors (Part II: Beyond Beardiedome)
I still had to go back and decide how to latch the awesome acrylic doors that cost me about $55 to make. For the first few days that Tad was testing his new home, I just used a bungee cord stretched from one side to the other.
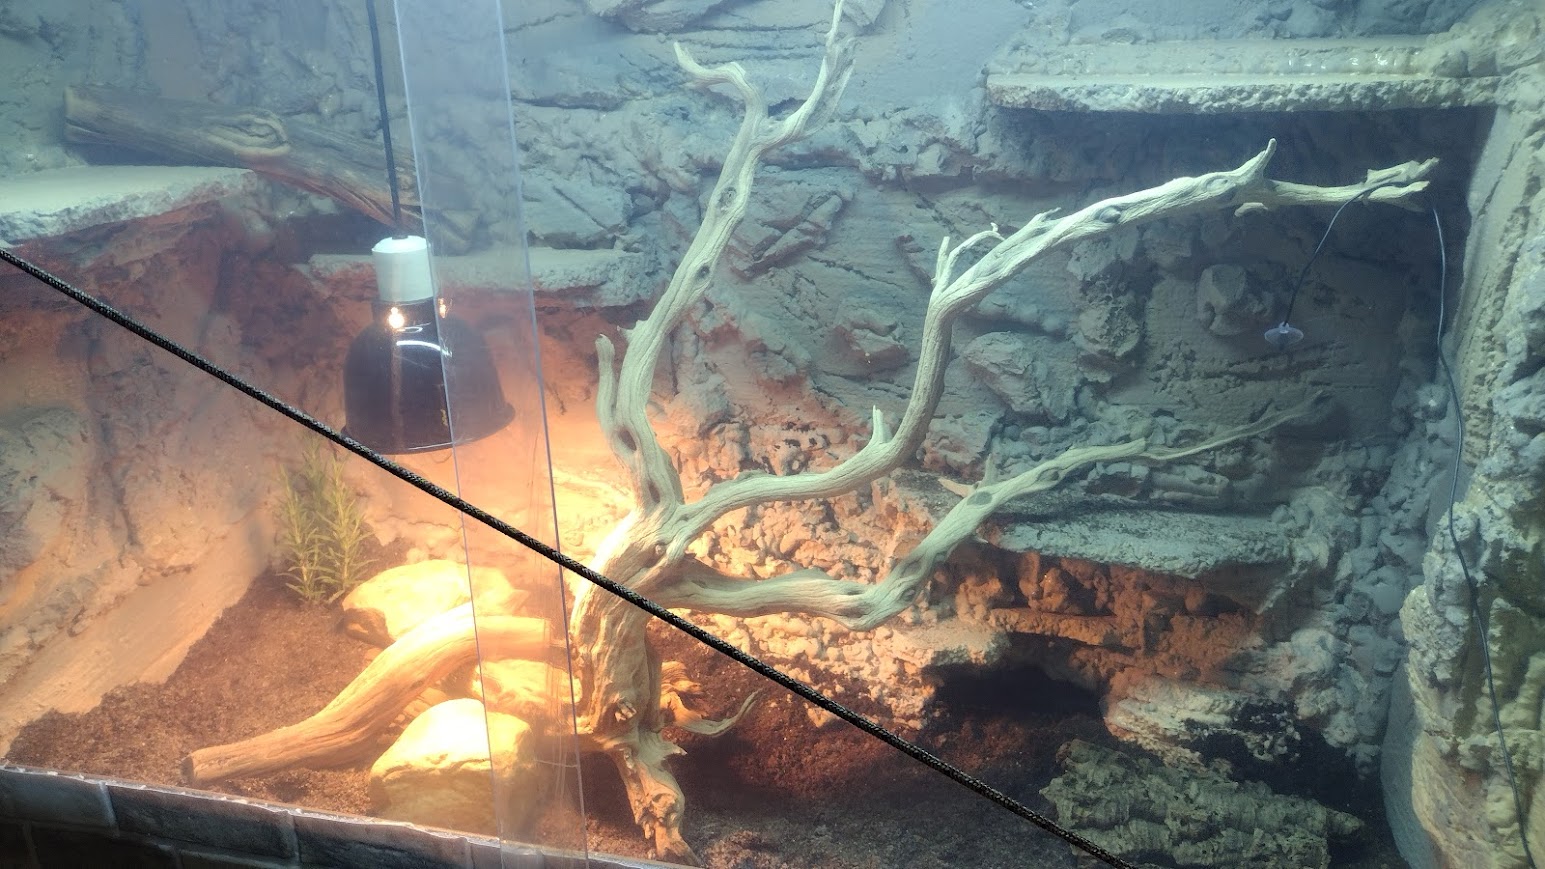
During that time, I explored various latches, magnets, and clips. In the end, I came to the conclusion that I would feel most comfortable with some kind of crossbar that went all the way across the front. (Like a big wooden beam locking a castle door.)
A simple and elegant solution, really. You’ve probably realized that one advantage of my method is the numerous pre-drilled holes on the shelving unit legs. All I did was use bolts and washers to mount a hook to either side of the doors, then drop a metal rod in the hooks to lock it up.
Additional Parts, Features, Substrates, and All That
There are some things I would have needed whether I built Tad this custom enclosure or bought one like the Mojave or the Zen Habitats. For one, I would have needed to buy aquarium sealant because you have to seal these store bought enclosures anyway. I also would have needed lights and substrate and a new, big branch for him to sit on.
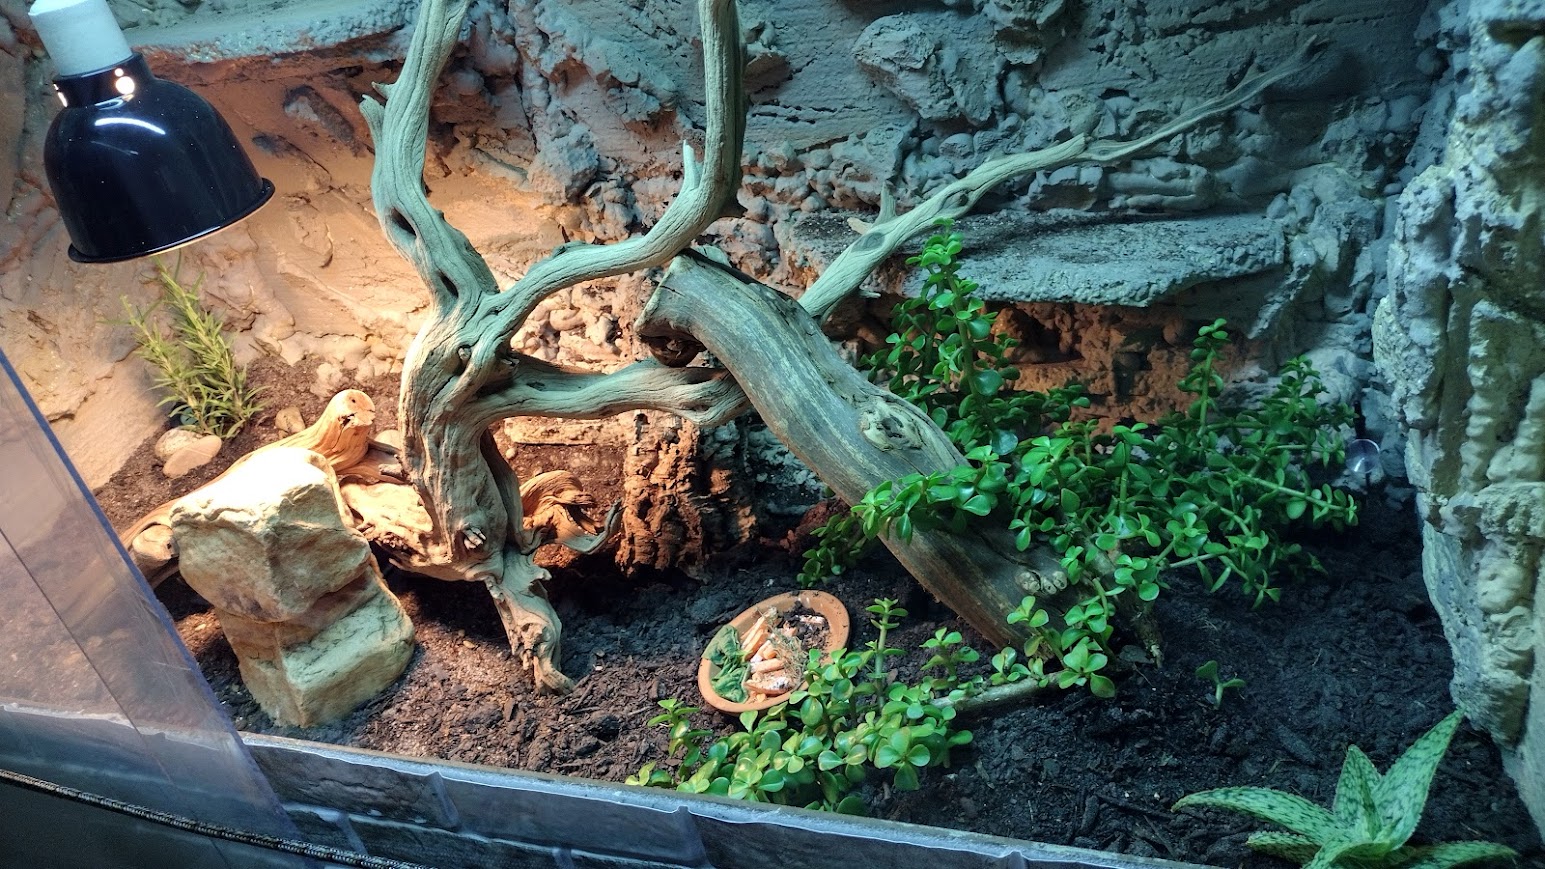
I don’t include any of this in my estimate of the build cost because any enclosure would need them. Even if you use this design and line it with paper towels (meh) you’re spending the same on substrate either way.
UVB and Basking Lights
Bear in mind that you will probably need to figure out your light situation differently. You can either:
- Build an enclosure that’s not as tall and create a mesh top for it (I’ll bet that would be stupid easy, because you could just get a 4×2 mesh aquarium top and install it inside one of the shelf frames.)
- Or you will need to accommodate all that extra height with appropriate UVB and basking solutions that are mounted inside the enclosure. Your lights will need to reach quite a distance!
In terms of basking, I knew I was going to need to hang an interior lamp. I just bought an appropriate hood and used cable mounts to hang it from the top of the enclosure. It works and looks clean, but feel free to use a chain and eye hook arrangement if you’re so inclined.
I also upgraded him to a 36” long T5 UVB setup which I installed directly into the ceiling as well. In theory, he can get anywhere from 10” to 30” away from the light depending on where he goes in the enclosure. Even if this wasn’t ideal, I wasn’t worried because Tad has always spent 1-2 hours every day outside of his enclosure either basking in actual sunlight or under a 100w UV-emitting MVB. If your lizard doesn’t get additional sun or UV light, you will want to make sure your mounted UVB system is providing the right amount of quality light throughout the enclosure.
Safety Warnings and Considerations
One downside of taking on the custom enclosure task is that you become responsible for every aspect of the build. You’ll need to be vigilant about hazards. Test your enclosure!
- Keep an eye on how your lizard explores it and watch for any potentially dangerous falls from high up.
- Ensure your lizard isn’t able to reach the basking lamp and burn themselves.
- Ensure everything is properly sealed to prevent escaping dragons, leaking substrate, or invasive wildlife*.
- You are responsible for figuring out the temperatures in this enclosure. This is your custom-built box, and how you build it, seal it, and line it with foam will affect its little ecosystem. You don’t want to accidentally build an oven (or a freezer), so measure the temperatures throughout the day in various parts of the enclosure.
- Ventilation is something you’ll have to consider. I originally wanted to cut holes in the side walls and install vent covers, but changed my mind when I realized the way I mounted the doors left a 1.5” gap across the entire front of the enclosure. I just drilled several 2” holes along the top of the side walls using a hole saw, both for airflow and for electrical cords.
- Be mindful of fire risks. There’s no such thing as a truly fireproof foam, so bear that in mind when making a box out of wood and foam and then shoving a hot lamp in it. Mount the lamp securely. Make sure it’s not heating up anything that will melt or burn.
* Tad’s enclosure was so awesome that a jealous Cuban Curly-Tailed Lizard somehow found his way into it and moved in a few weeks after it was finished. I have no idea how this happened, and it scared the crap out of me when I discovered him. Bioactive indeed.
Cost and Labor Breakdown
If you subtract the time I spent waiting for parts to arrive in the mail, I spent about four days on this build. I’m confident that after this experience, I could complete a similar build in a weekend as long as I had all of the materials on hand. (And trust me…I plan on building a lot more of these after we move into a larger house.)
I’m doing this parts list mostly from memory, but I was able to find some receipts so I could link to the exact parts at Home Depot:
The Structure
- Muscle Rack 48″x24″x72″ Garage Shelf – $170 (I consider this a wash, since I would have had to buy a stand or shelf for any other enclosure anyway.)
- 3 x Hardboard Project Panel – $6.49 each
- Nuts, Bolts, and Washers – $10 (if that)
- Aquarium-Safe Silicone Sealant – $12.95
- Acrylic Panels – $43 (I bought the 3mm thick option)
- 2 x Hinge Sets – $3.27 each (2″x2″)
Total: $261.96
The Hardscape
- 8 x Great Stuff Foam – $5.98 each (I doubt I would buy this many if I did this project again)
- Poly EPS Insulation Panel 6 pack – $10.98 (I would use more of these instead; Note that EPS is environmentally benign and no toxic chemicals are used to make it. It’s the same stuff foam cups are made from. Just don’t set it on fire.)
- Original Drylok Gallon – $40
- Chalk paints from Walmart for Coloring the Drylok – $10 (or so)
Of course, the hardscape is optional. If you’re going to keep the enclosure very dry, you wouldn’t even need the Drylok.
Total: $108.58
Tools Used
- 14.4v Cordless Drill (for drilling bolt holes in walls and acrylic doors)
- Hammer
- Screwdriver
- Pliers or box end wrench (to tighten bolts)
- Box Cutter (there are better ways to cut hardboard, but this worked well. I just scored a deep line and snapped it off)
- Serrated Knife
- Caulk Gun (for the aquarium silicon)
- Hole Saw bit for drill (making holes for the electric cords, vents)
- Brushes (for applying Drylok)
Conclusion
At this point, I’ll never buy another enclosure. After seeing how downright easy it was to build a huge enclosure to my specs — and how cheap — I see no need to.
Think about it. Commercially-available stands for enclosures can cost more than it cost me to build a 240 gallon setup with a built-in stand and storage. And have you priced a store-bought 240 gallon enclosure? Or, heaven forbid, custom ones? I’ve seen 120 gallon setups go for $700 or more at expos, and I didn’t spend that much on the structure, decorations, substrate, and lighting combined.
Plus, you can upgrade this design till your heart’s content. Want to use higher-quality materials like waterproof HPDE? Just swap it out! Want to make it prettier to look at for your living room? Paint it. Or you can easily cover the corners with furniture corner guards or something like that. All things considered, you can pimp this out to the point of absurdity and still save hundreds of dollars.
What do you think? Your feedback is welcome! (And if you have questions about the build, feel free to email me or post a comment!)
Requisite Disclaimer:
I take no responsibility for damages or injuries resulting from the information in this post. I am not a contractor, aquarium builder, or zookeeper. This information is provided for informational use only.
